Setup an Email Account on Outlook 2013/2016/365
See below steps on how to add your email account on Microsoft Outlook 2013 / 2016 / 365, or see our updated video tutorial here.
Steps:
1. In Outlook 2013, click File then select Info from the dropdown menu.
2. Click Add Account.
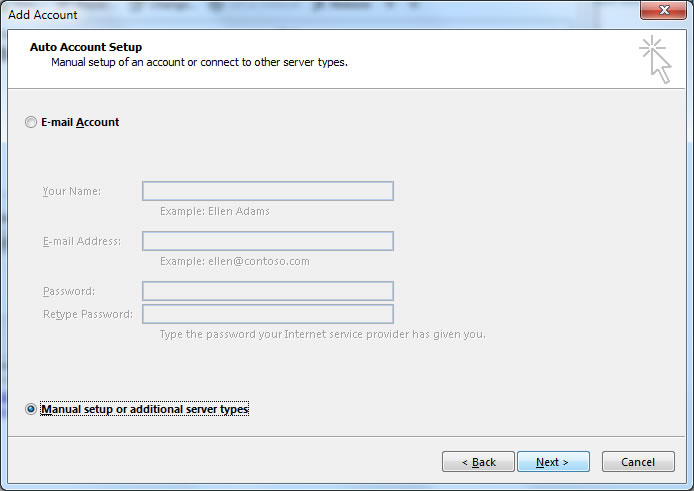
3. Select the E-mail Account option from and click [Next].

4. Select the Manually setup or additional server types option on the bottom, click [Next].

5. Select POP or IMAP email account type and click [Next]:

6. Insert your Internet Email Settings
Your Name: The name you wish displayed when people receive your emails
Email Address: The email address you are sending email from.
Account Type: POP3
Incoming mail server: mail.yourdomain.com.
Outgoing mail server: mail.yourdomain.com or your Internet Service Provider’s (ISP) outgoing mail server.
Username: The email address you are sending email from.
Password: The password used for this email account and select the remember password option.

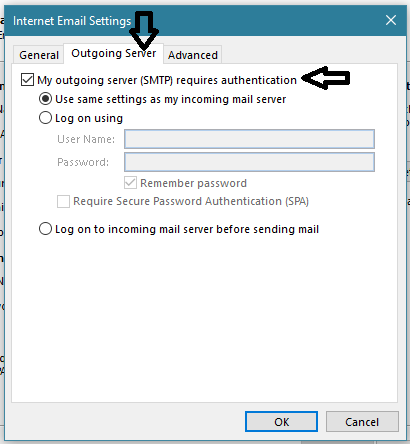
7. Click on “More Settings“. Then click on the “Outgoing Server” tab. Then tick “My outgoing (SMTP) requires authentication“. Then click the “OK” button to save.

